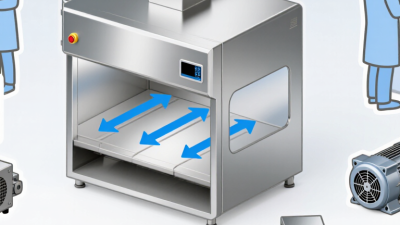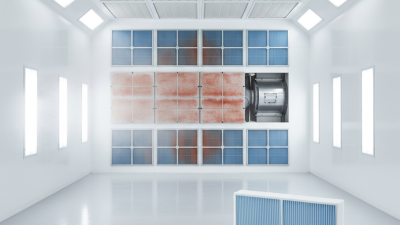
Choosing a Laminar Flow Hood is more than comparing prices and polished product photos. The right unit must match your work, room, airflow needs, and maintenance capacity. A compact benchtop model may suit small sterile tasks, while larger equipment requires stronger planning and stable floor space.
This guide presents 10 Laminar Flow Hood buying tips for a more informed decision. It examines airflow direction, HEPA filter performance, work-area dimensions, noise, lighting, certifications, and service support. Practical details matter. Check whether a 0.9-meter workspace can hold your tools without crowding. Listen for fan noise if the hood will operate beside staff for hours. Ask how filter replacement is tested and documented.
Performance varies. A low-cost hood can appear attractive but create hidden expenses through weak support or difficult maintenance. Product claims also deserve careful review, especially when sellers use vague terms such as “clean” or “laboratory grade.” Independent testing and clear specifications provide stronger evidence than confident marketing language.
No single Laminar Flow Hood fits every laboratory or production setting. User experience, installation conditions, and operating habits can change the result. Even careful buyers may overlook access height or electrical requirements. That is worth reconsidering before purchase. These tips are designed to support sensible comparisons, reduce avoidable mistakes, and encourage questions that manufacturers should answer clearly.

10 Laminar Flow Hood Buying Tips: Define Protection Needs
Before comparing airflow speed, define what must be protected. A laminar flow hood usually protects the product from airborne particles. It may not protect personnel from hazardous vapors, infectious materials, or chemical splashes. That distinction matters. A sterile component may need clean, unidirectional air, while an operator handling harmful substances needs a different containment design. Review the product, the user, and the room as separate risk points.
Tip: Write three short risk notes before requesting quotes. Describe the material, the operator’s exposure, and possible environmental release. Include details such as powder, liquid, heat, dust, and cleaning chemicals. In practice, a small open vessel can create more concern than its size suggests. I have seen teams focus on particle counts and overlook solvent vapor. That is an easy mistake, but it can change the entire equipment choice.
Tip: Match protection claims to verified testing. Ask for airflow uniformity data, filter performance, noise levels, and alarm functions. Consider where the hood will sit, especially near doors, vents, or busy walkways. A clean bench placed beside a frequently opened door may lose practical value. It may look impressive. It may still fail the workflow. Discuss maintenance access, filter replacement, and operator training with a qualified safety professional. Recheck the decision when materials or procedures change.
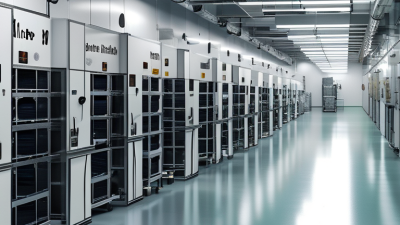
Choosing ISO 5 cleanliness should be your first buying filter. ISO 14644-1:2015 sets the limit at 3,520 particles ≥0.5 µm per cubic meter. Ask for test results under actual operating conditions, not only an empty-cabinet reading. A particle counter should record locations, airflow status, and sampling time.
Check the hood’s unidirectional airflow pattern with smoke visualization. Turbulence around the work zone can carry particles toward exposed materials. ISO 14644-2:2015 recommends a performance monitoring plan, so request routine particle, airflow, and filter-integrity checks. Confirm the final filter’s efficiency through an accepted test method, such as ISO 29463. A high-efficiency filter alone does not guarantee ISO 5 performance.
Measure the usable work area, not just the external width. Review face velocity, noise, vibration, lighting, alarms, and access for cleaning. The hood should protect the product; it may not protect the operator from hazardous substances. That distinction matters. I would not trust a glossy certificate alone. Ask for calibration records, field certification, maintenance intervals, and documented recovery time. Practical experience suggests that poor loading can disrupt cleanliness, even in a certified unit. Keep containers low and avoid blocking the airflow path. Small habits matter. Some purchasing teams overlook ergonomics, then discover operators work around the design. That assumption deserves scrutiny.
ISO 5 permits no more than 3,520 particles ≥0.5 µm per cubic meter of air.
The chart shows the maximum concentration limits defined by ISO 14644-1 for particles ≥0.5 µm. When selecting a laminar flow hood, confirm that the unit is designed and certified to maintain ISO 5 conditions at the working zone under the intended operating and loading conditions.
Filter efficiency deserves careful comparison. HEPA filters commonly remove 99.97% of 0.3-micrometer particles. This benchmark appears in U.S. Department of Energy guidance. ULPA filters can reach 99.999% efficiency, often tested near 0.12 micrometers. ISO 29463 and IEST-RP-CC001 stress that test conditions matter. Therefore, 99.999% is not automatically five times better. Particle size, airflow, leakage, and installation can change real protection. I once compared percentages alone. That shortcut was weak.
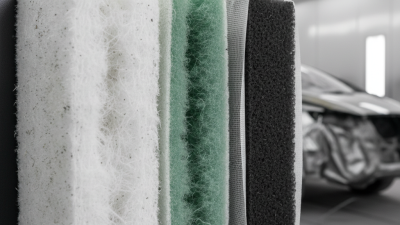
Buying tip: Request the exact test standard, particle size, airflow, and pressure-drop data. Check whether the certificate covers the installed filter. A clogged filter may reduce airflow and disturb the clean work zone. Higher efficiency can also increase resistance and energy use. The U.S. Department of Energy notes that pressure drop affects fan performance and operating costs. Ask for replacement intervals, gasket design, and scanning-test records. Do not accept “99.999%” without conditions.
For delicate cell work, low particle counts may justify ULPA filtration. However, many routine applications need reliable HEPA performance instead. The correct choice depends on contamination risk, product sensitivity, and validated workflow. ISO 14644-1 measures airborne cleanliness by particle concentration, not filter percentage alone. That distinction is easy to miss. Inspectors should also verify recovery time, vibration, noise, and uniform airflow. A perfect filter cannot rescue poor cabinet design or careless handling. Check the data twice.
Airflow speed is a critical buying point for any laminar flow hood. A typical design range is 0.3–0.5 m/s across the working zone. This range supports steady, unidirectional air movement without excessive turbulence. Faster is not always better. High velocity may disturb lightweight materials or create uncomfortable working conditions.
Ask for airflow uniformity data, not only the average speed. A calibrated anemometer should measure several points across the work surface. Readings should remain reasonably consistent from the center to the corners. Smoke visualization can reveal dead zones that numbers might miss.
During commissioning, check the hood at its normal operating position. A raised sash or blocked grille can change the actual airflow. Small details matter.
Filter condition also affects performance. A clogged prefilter can reduce pressure and weaken the working-zone velocity. I once saw a cabinet pass a quick center-point check while its corners moved noticeably slower. That result was not useless, but it was incomplete.
Request recent testing records, calibration details, and acceptance criteria from a qualified technician. Consider noise, vibration, and alarm functions too. A quiet hood may still perform poorly. Measure before trusting appearances.
10 Laminar Flow Hood Buying Tips?
Certification should be your first checkpoint. Ask for current test records, not a sales promise. Confirm airflow velocity, filter integrity, particle levels, and electrical safety. The report should identify the tested unit and date clearly. During inspections, I have seen equipment pass visually but fail airflow measurements. Appearance is not proof.
Plan installation before delivery. Measure doorways, bench depth, ceiling height, and nearby power outlets. A qualified technician should check room airflow and place the hood away from doors, fans, and heavy traffic. Poor positioning can disturb the clean air pattern. It may also increase contamination risk. Noise deserves a practical test. Stand beside the operating hood for ten minutes. Listen for rattling, vibration, or a harsh fan tone. Ask for the measured decibel level at the user’s position, not only the laboratory rating.
Energy use affects every working day. Compare motor power, standby consumption, and expected filter pressure changes. A quieter, efficient motor may cost more initially but reduce long-term expense. Request maintenance intervals and replacement procedures in writing. Schedule annual testing with a competent service provider, even when the hood seems normal. Filters can load gradually, while performance declines unnoticed. Keep each certificate, repair note, and test result together. I once underestimated recordkeeping; finding an old fault later was unnecessarily difficult. That mistake changed my buying checklist.
| # | Buying Area | What to Verify | Practical Benchmark or Requirement | Recommended Evidence |
|---|---|---|---|---|
| 1 | Confirm the intended protection | Determine whether the unit is a clean bench, a vertical laminar flow hood, or a biological safety cabinet. A clean bench protects the work, but it does not protect the operator or room from hazardous biological or chemical materials. | Use a clean bench only for non-hazardous, non-pathogenic work where product protection is the primary objective. Select a separately certified containment cabinet when personnel or environmental protection is required. | Application assessment, risk review, and written equipment specification. |
| 2 | Verify HEPA or ULPA filtration | Check the filter type, efficiency rating, dimensions, gasket or gel-seal design, replacement method, and whether the filter is factory-tested for leaks. | A typical HEPA rating is at least 99.97% efficient at the most penetrating particle size, commonly tested near 0.3 micrometres. ULPA ratings are higher, but pressure drop and energy demand may also increase. | Filter certificate, serial number, factory scan or leak-test report, and replacement-filter specification. |
| 3 | Ask for certification details | Confirm which standard is used for field certification and what tests are included. Do not treat a general electrical or safety approval as proof of clean-air performance. | A field report should normally include airflow velocity or volume, airflow uniformity, HEPA filter integrity, particle counts where applicable, illumination, noise, and vibration. ISO 14644-1 may be used for airborne-particle classification, but it does not replace equipment performance testing. | Sample certification report, test-method references, technician qualifications, and acceptance criteria. |
| 4 | Check airflow direction and velocity | Confirm whether airflow is horizontal or vertical, where the intake and exhaust are located, and whether the stated velocity is measured at the work zone rather than only at the filter face. | Many clean benches operate around 0.3–0.5 m/s at the work position, but the manufacturer’s validated range and the application’s requirements should control the final setting. | Airflow diagram, factory test data, field velocity map, and uniformity results. |
| 5 | Plan installation and room location | Allow sufficient clearance from walls, doors, supply diffusers, return grilles, traffic routes, and heat-producing equipment. Confirm floor loading, electrical supply, access for service, and delivery route. | Avoid locations with cross-drafts or frequent traffic. Final clearances must follow the installation manual because turbulence can disturb the intended unidirectional airflow. | Scaled room layout, utility schedule, installation checklist, and site acceptance record. |
| 6 | Evaluate work-zone dimensions | Compare internal width, depth, height, usable opening, front access, load capacity, and the position of outlets or service ports with the actual process and equipment. | Keep materials arranged so they do not block the airflow path or cover a substantial portion of the perforated work surface. The usable work zone is more important than the external cabinet width. | Dimensioned drawing, maximum equipment envelope, load rating, and workflow mock-up. |
| 7 | Compare noise and vibration | Request the sound-pressure level, measurement distance, operating condition, and room assumptions. Check fan vibration and whether the work requires microscopes, balances, or other vibration-sensitive instruments. | A practical comparison range for many laboratory clean benches is approximately 55–70 dBA, although actual results depend on fan speed, filter loading, room acoustics, and measurement method. Lower noise is not automatically better if airflow is inadequate. | Noise test report, vibration measurement, fan-speed settings, and on-site demonstration where possible. |
| 8 | Calculate energy use and heat load | Record fan motor input power, lighting load, control-system power, standby consumption, and any optional accessories. Ask how filter loading affects fan power over time. | Small laboratory clean benches commonly use a few hundred watts, but the actual value varies widely with size, filter resistance, fan type, and operating speed. Estimate annual cost as kW × operating hours × local electricity rate. | Measured input-power data, energy label or electrical schedule, duty-cycle estimate, and life-cycle cost calculation. |
| 9 | Define the testing and maintenance schedule | Confirm who will perform installation qualification, operational testing, filter integrity testing, airflow checks, and corrective maintenance. Establish the conditions that trigger an additional test. | Annual certification is a common minimum practice for critical laboratory equipment; test immediately after relocation, major repair, HEPA/ULPA replacement, or a significant airflow or performance change. Follow the applicable risk assessment and local requirements. | Preventive-maintenance contract, annual test checklist, calibration certificates, and service-response terms. |
| 10 | Review total cost and documentation | Include purchase price, freight, installation, certification, replacement filters, fan energy, service visits, calibration, downtime, and end-of-life disposal. Ensure operating instructions are clear for all users. | Choose the unit that meets validated performance requirements with documented service support, rather than selecting solely by initial price. The final specification should identify acceptance limits and responsibilities. | Itemized quotation, warranty, spare-parts list, user manual, training record, acceptance protocol, and five-year cost estimate. |
Important: Performance values are typical reference ranges, not universal acceptance limits. The final requirements should be based on the process risk, applicable regulations, the manufacturer’s validated design, and field-certification results.